
How to Fix a Dripping Tap
A dripping tap is not only an annoyance, but it can also be a cause of a higher water bill and could also cause water damage to your property. If you’re confident with DIY, then fixing a leaky tap might be easier than you think and will save you the time and expense of calling in a plumber. Continue reading to find out how to fix a dripping tap.
Last updated - 07/10/2022
Estimated reading time - 7 minutes
What tools will I need to fix a dripping tap?
To fix a dripping tap, you need some or all of the following tools:
- An adjustable wrench/spanner
- A flat-head and a cross-head screwdriver
- An allen key
- A pair of scissors
- A replacement cartridge, tap washer, or O-ring
Whether you need a cartridge, a tap washer, or an O-ring will depend on the type of tap you have installed.
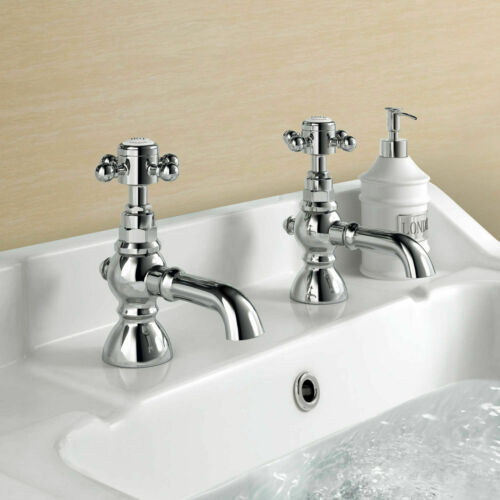
Traditional tap
If you screw the head of your tap to release and restrict the flow of water, then you have a traditional tap, also known as a compression valve. If you have this type of tap, you will need a new tap washer and/or a new O-ring.
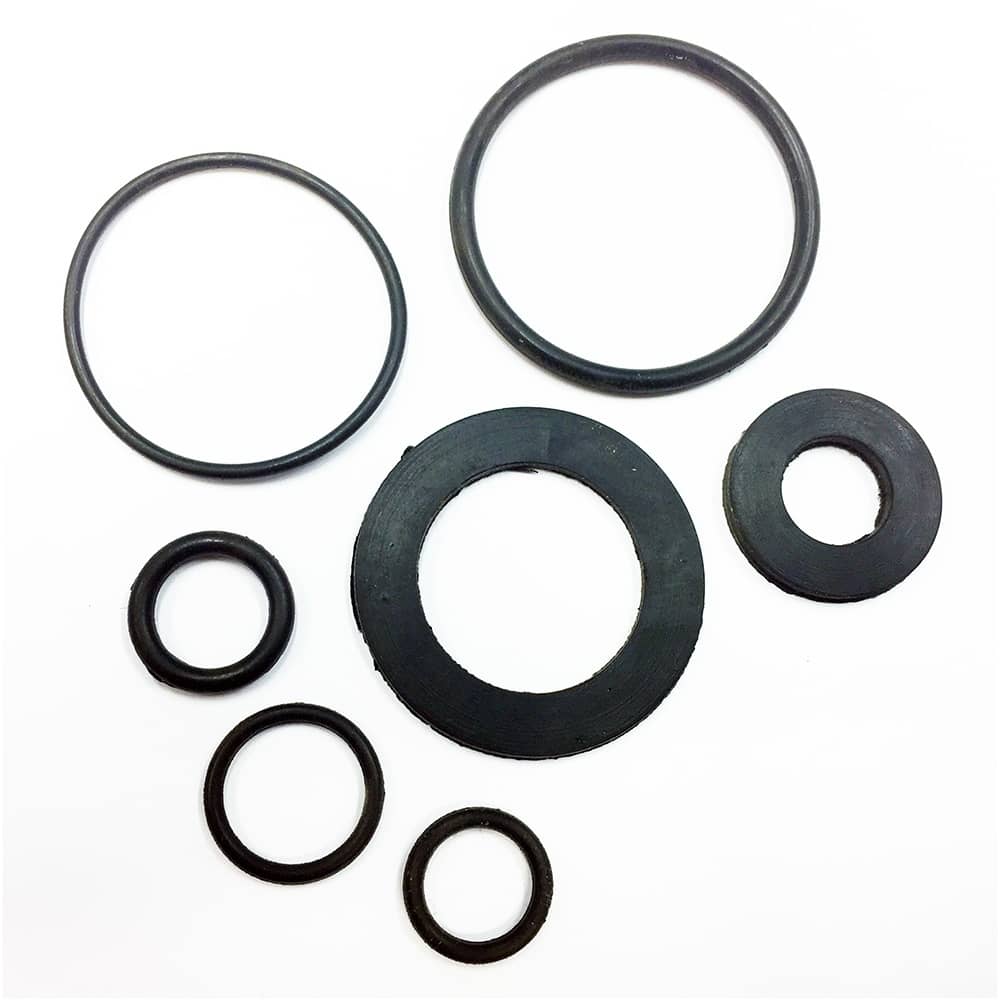
Tap washers and O-rings are rubber components that are used to make a seal in order to prevent leaks. You will be able to buy tap washers and O-rings online or from your local DIY store for a few pounds.
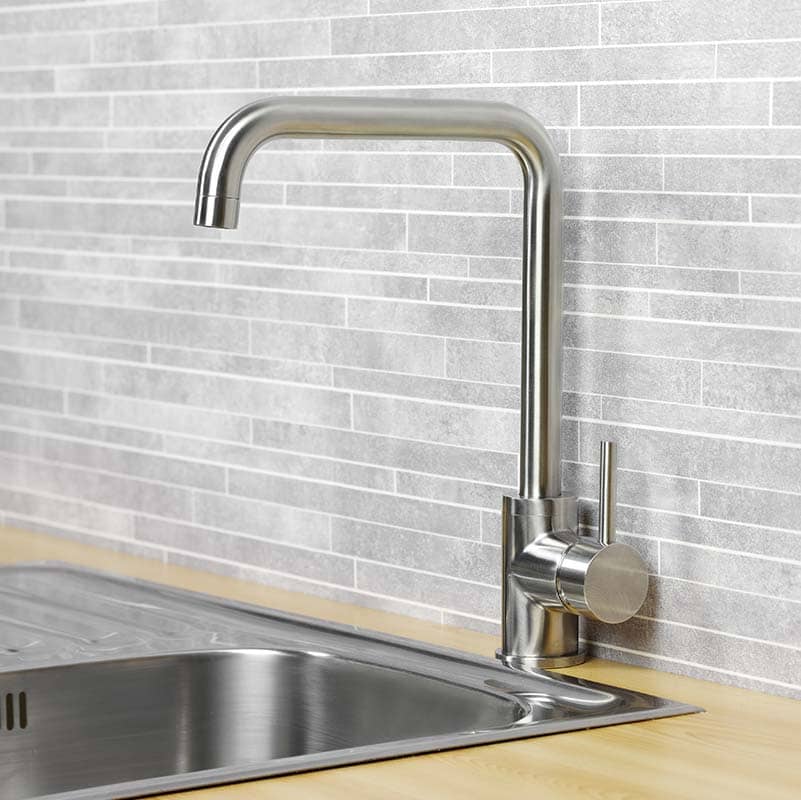
Monobloc tap
Monobloc taps have a single spout for both hot and cold water. The flow and temperature of the water are often controlled with a single lever or handle.
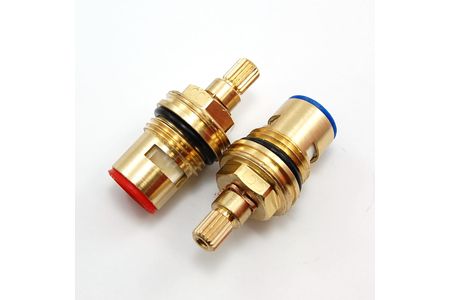
In order to fix a leaky monobloc tap, you will need to replace its cartridge.
A ceramic mixer tap cartridge is a cylindrical component located inside of a monobloc tap. It controls the flow and the mixing of hot and cold water. It consists of a pair of discs that sit on top of each other- the bottom disc remains fixed while the upper disc rotates to mix hot and cold water when the handle is operated.
Tips before fixing a dripping tap
Turn off the water supply
As with any plumbing work, before you start the process of fixing a dripping tap, you should disconnect the water supply. You can do this by using the main stopcock (also known as a shut-off valve). The main stopcock is a tap that controls the mains water coming into your home.
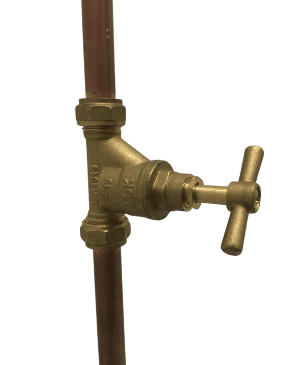
The most common place for the main stopcock is under the kitchen sink, but if yours isn’t located there, other common locations for the stopcock are:
- In the bathroom
- Cupboard under the stairs
- By the gas meter
- In a utility room
- In a cellar
- In a cupboard - this can be common for flats. Stopcocks can also be found in communal corridors.
After you turn off the main water supply, run the tap to drain any standing water left in the tap.
Put a plug in the plughole
Before you start to take apart a tap to fix it, make sure you plug the plughole. This is to ensure you don’t lose any screws, washers, or other small parts down the drain.
Put parts to one side in the order you disassemble them
If you put all the parts of the tap to one side in the order that you disassemble them, it will be easy for you to reassemble the tap once you have finished replacing the faulty parts.
Avoid unexpected costs.
With a Smart Plan cover plan, if something goes wrong with your plumbing we aim to have an engineer with you within two working days. Cover-plan call-outs are booked Monday to Friday, 08:00 to 18:00.
How to fix a dripping tap: Traditional tap
A traditional tap uses a compression valve. If you screw the head of your tap to release and restrict the flow of water, then you have a traditional tap with a compression valve. In order to fix a leaky traditional tap, you will need to replace its washer and/or O-ring.
To replace a tap washer and/or O-ring, follow these steps:
- Turn off the water supply. You can do this by turning off the mains stopcock. Once you have turned off the water supply, turn on the tap to ensure no water is still inside the faucet.
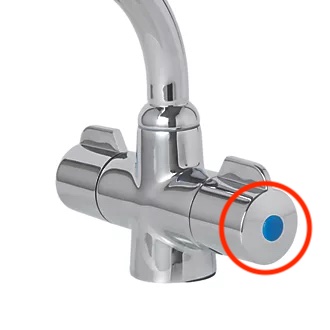
- Take off the tap cap. Most taps will have a cap on the knob to indicate whether it’s a hot or cold tap. You will need to remove this cap to expose the tap handle screw. Some tap caps can be removed by hand, if yours cannot, use a flat-head screwdriver to take it off.
- Unscrew the tap handle. Now that the tap cap is off, you should be able to see a screw in the tap handle. Depending on the type of screw, use a screwdriver or an allen key to unscrew it.
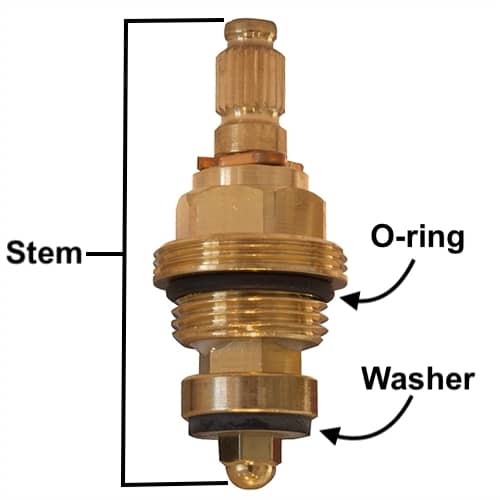
- Remove the tap stem. To remove the stem, you will need to loosen the nut that holds it in place. Grab your spanner and untighten the nut that is holding the stem in place.
- Remove and replace the washer. A damaged or loosened tap washer is often the cause of a dripping tap. Pull the washer off and replace it with a new one. If you can’t pull it off by hand, use scissors to cut it and remove it. Make sure the new washer is a tight and exact fit for the tap, otherwise you will encounter the same problem again.
- Remove and replace the O-ring. If there’s still a leak after replacing the washer, the likely cause of the leaky tap will be a worn O-ring. The O-ring is a larger version of the washer found at the bottom of your tap spout. Remove the O-ring and replace it with a new one.
- Put the tap back together. Once you have replaced the washer and/or o-ring, put the tap back together. If you laid the parts aside in the order you took them apart, put them back together in reverse order.
- Turn on the water supply. Now that you have put the tap back together, it is now time to see if the tap is still leaking. Turn the water supply back on and run the tap. Turn the tap off and see if it has stopped leaking.
How to fix a dripping tap: Monobloc tap
Monobloc taps, or mixer taps, have one handle that controls both hot and cold water and dispenses the water out of a single spout. If your monobloc tap is leaking, you will need to replace its ceramic disc cartridge.
To replace a tap cartridge, follow these steps:
- Turn off the water supply. You can do this by turning off the mains stopcock. Once you have turned off the water supply, turn on the tap to ensure no standing water is inside the faucet.
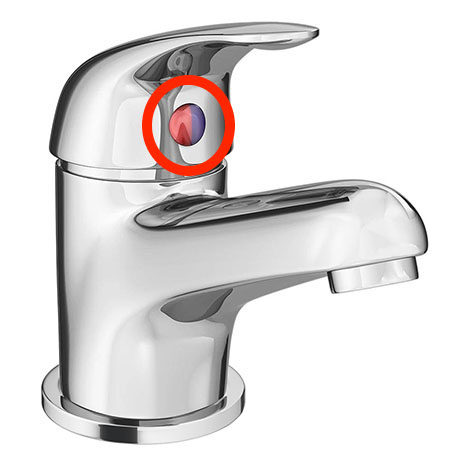
- Remove the tap head. If your tap has a lever, you will be able to unscrew it by hand. Twist the lever counterclockwise until it is unscrewed. Once unscrewed, you should be able to see a small nut. Unscrew this nut with either an allen key or a screwdriver. Now that you have unscrewed the nut, you will be able to pull off the handle to expose the cartridge.
If your tap has a hot or cold water indicator cap (see image), you will be able to remove it by hand or with a flat-head screwdriver to expose the nut you need to unscrew to be able to pull off the handle to get to the cartridge. - Unscrew the nut to release the cartridge. Using an adjustable spanner, unscrew the nut that is holding the cartridge in place. Once loosened, remove the cartridge.
- Replace the cartridge. Replace and tighten the cartridge.
- Put the tap back together. Now that the new cartridge is in place, you can reassemble the tap. If you laid the parts aside in the order you took them apart, put them back together in reverse order.
- Turn on the water supply. Now that you have put the tap back together, it is now time to see if the tap is still leaking. Turn the water supply back on and run the tap. Turn the tap off again and see if it has stopped leaking.
What should I do if my tap is still dripping?
If you have taken the steps outlined in this article but your tap is still dripping, then it is time to call in a professional to repair the issue. Get in touch with us today to see how we can help you with your home’s plumbing problems.
Let us fix your plumbing.
At Smart Plan we work with a national network of thousands of vetted engineers and tradespeople. We aim to get an engineer out to you within two working days, with cover-plan call-outs booked Monday to Friday, 08:00 to 18:00.

Call us today
Customer service
0333 772 6247New customers
0333 772 6247Write to us
By email
hello@smart-plan.comBy post
2nd Floor, Melrose House
42 Dingwall Road
Croydon
CR0 2NE